Hugo 博客部署
一句话版:Hugo 把「写文章」变成「发网站」只要几秒钟,内网云隧道再给它开扇公网大门——博客放自家、静态不怕黑、公网随意看。
一、为什么选 Hugo + 内网云隧道?
搭建个人博客有很多方案,为什么推荐 Hugo + 内网云隧道 这个组合?
| 方案 | 优点 | 缺点 |
|---|---|---|
| Hexo | 生态丰富,插件多 | Node.js 依赖重,国内 npm 源慢 |
| WordPress | 功能强大,所见即所得 | 需要 MySQL + PHP,资源占用高 |
| GitHub Pages | 免费托管 | 国内访问慢,自定义域名麻烦 |
| Hugo + 内网云 ✅ | 零依赖、极速构建、公网访问 | 需要自有主机 |
Hugo 的核心优势:
- ⚡ 极速构建 — 500 篇文章构建仅需 161ms
- 📦 零依赖 — 单个二进制文件,无需 Node.js/Python/PHP
- 🔒 纯静态 — 无数据库、无运行时漏洞
- 🌙 主题丰富 — PaperMod、Stack、Next 等优质主题
内网云隧道的价值:
- 🌐 公网访问 — 家里的主机也能对外提供服务
- 🔐 数据自有 — 站点文件都留在自己机器上,随时可迁移
- 💰 零成本 — 不需要云服务器、不需要域名备案
二、环境准备
2.1 架构总览
┌──────────────┐     ┌──────────────┐     ┌──────────────┐
│   读者(公网)  │────▶│  内网云平台    │────▶│  你的主机      │
└──────────────┘     └──────────────┘     └──────────────┘
   访问你的公网域名      SSH 反向隧道          Hugo Server
     (80/443 端口)      nssh 客户端            1313 端口
2.2 你需要准备什么
| 需要 | 说明 |
|---|---|
| 一台主机 | 能长期开机的电脑、小主机即可,Windows/macOS/Linux 都行,下文以 Linux 为例 |
| 配置 | Hugo 很轻量,512MB 内存都绰绰有余,闲置的旧电脑就能跑 |
| 网络 | 主机能访问 GitHub(下载 Hugo 与主题用) |
不用专门买服务器:手头淘汰的旧笔记本、小主机都行——Hugo 只占一点点资源,剩下的交给内网云隧道去「开门」。
2.3 登录主机
下面的安装操作都在主机上执行。如果你远程操作,先用 SSH 登录(把 IP 换成主机的真实内网 IP):
ssh root@<你的内网IP>
# 建议配置 SSH 密钥登录,比每次手动输密码更安全
三、安装 Hugo
3.1 下载 Hugo 二进制
Hugo 是单个二进制文件,无需安装依赖:
# 下载 Hugo extended(支持 SCSS/SASS)
HUGO_VER="0.161.1"
wget -q "https://github.com/gohugoio/hugo/releases/download/v${HUGO_VER}/hugo_extended_${HUGO_VER}_linux-amd64.tar.gz" -O hugo.tar.gz
tar xzf hugo.tar.gz hugo
mv hugo /usr/local/bin/hugo
chmod +x /usr/local/bin/hugo
rm -f hugo.tar.gz

# 验证
hugo version
# → hugo v0.161.1+extended linux/amd64
💡 GitHub 下载慢?可以给 wget 配代理或改用国内镜像加速下载,具体以你本地网络环境为准。
3.2 安装 Dart Sass
PaperMod 主题需要 Dart Sass 编译 SCSS:
SASS_VER="1.99.0"
wget -q "https://github.com/sass/dart-sass/releases/download/${SASS_VER}/dart-sass-${SASS_VER}-linux-x64.tar.gz" -O sass.tar.gz
tar xzf sass.tar.gz
mv dart-sass /opt/dart-sass
ln -sf /opt/dart-sass/sass /usr/local/bin/sass
rm -f sass.tar.gz

# 验证
sass --version
# → 1.99.0
⚠️ 为什么需要 Dart Sass? Hugo 从 v0.114 开始弃用了内置的 LibSass,转而使用 Dart Sass。PaperMod 主题使用 SCSS 格式,必须安装 Dart Sass 才能编译。
四、安装 PaperMod 主题
4.1 创建 Hugo 站点
cd /opt
hugo new site hugo-blog
cd hugo-blog
git init
4.2 安装 PaperMod 主题
# 通过 git submodule 安装(推荐)
git submodule add --depth=1 https://github.com/adityatelange/hugo-PaperMod.git themes/PaperMod

# 验证
ls themes/PaperMod/theme.toml
4.3 配置站点
编辑 hugo.toml:
baseURL = "http://<你的内网IP>:1313/"
languageCode = "zh-cn"
title = "My Hugo Blog"
theme = "PaperMod"

[params]
  author = "Your Name"
  defaultTheme = "auto"       # auto/dark/light
  ShowReadingTime = true
  ShowShareButtons = false
  ShowPostNavLinks = true
  ShowBreadCrumbs = true
  ShowCodeCopyButtons = true
  ShowToc = true
  TocOpen = false

[menu]
  [[menu.main]]
    identifier = "posts"
    name = "Posts"
    url = "/posts/"
    weight = 1
  [[menu.main]]
    identifier = "tags"
    name = "Tags"
    url = "/tags/"
    weight = 2

[markup]
  [markup.highlight]
    style = "monokai"
💡 正式对外发布时,记得把
baseURL换成你的公网访问地址,否则页面里的链接会指向内网。
4.4 创建第一篇文章
mkdir -p content/posts
cat > content/posts/hello-world.md << 'EOF'
---
title: "Hello World!"
date: 2026-05-04
tags: ["hugo", "tutorial"]
summary: "My first Hugo blog post"
---

## Welcome to Hugo 🎉

This is a test post published through 内网云 tunnel.
EOF
4.5 构建并预览
# 构建静态站点
hugo --minify
# → Built in 88 ms

# 启动预览服务器
hugo server --bind 0.0.0.0 --port 1313 --baseURL http://<你的内网IP>:1313 -D
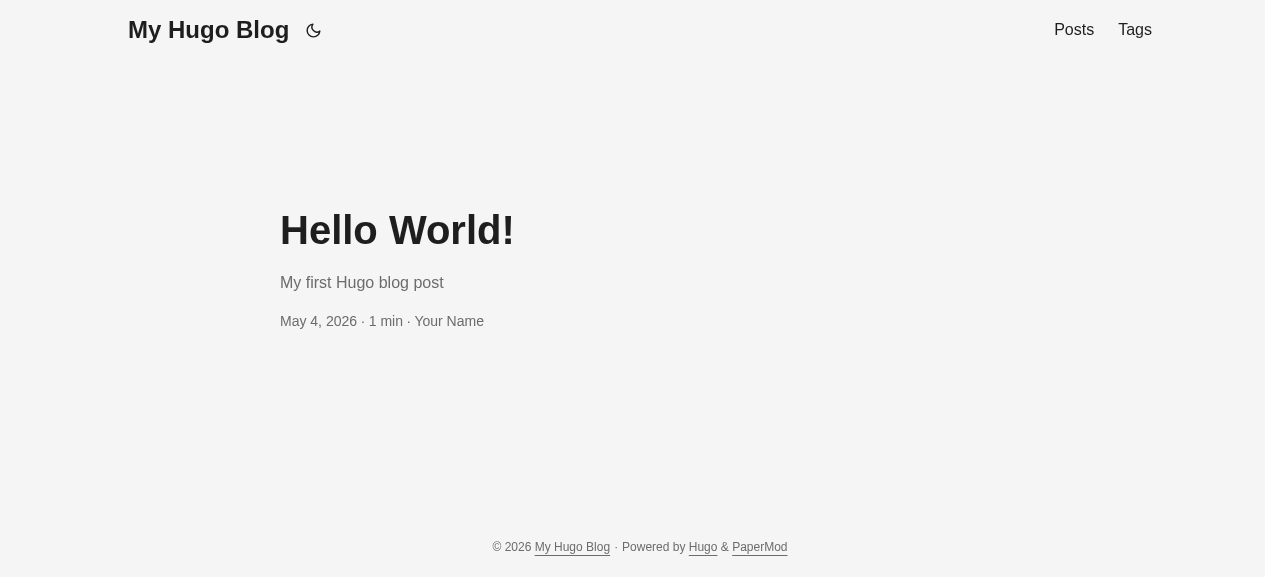
访问 http://<你的内网IP>:1313 即可看到博客效果:
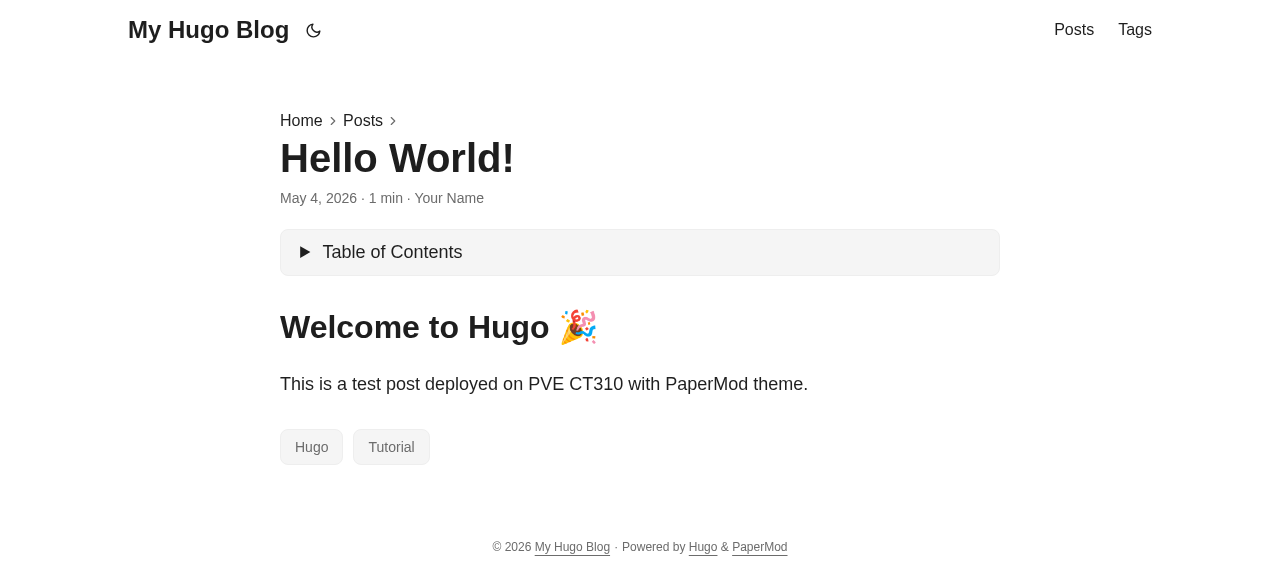
文章页面支持目录导航(Table of Contents)、标签分类、面包屑导航等 PaperMod 主题特性:
五、内网云隧道穿透
5.1 下载 nssh 客户端
nssh 是内网云官方 SSH 反向代理客户端,零依赖,单文件 6.7MB:
# 从内网云官网下载
# https://www.neiwangyun.net/client/download/
# 选择 Linux amd64 版本

# 下载后上传到主机
chmod +x nssh_client
mv nssh_client /usr/local/bin/nssh_client

# 验证
ls -lh /usr/local/bin/nssh_client
# → 6.7M
5.2 建立隧道
nssh_client --daemon -R 80:127.0.0.1:1313 yourname@gz2.neiwangyun.net -p 22 --passwd yourpassword
参数说明:
| 参数 | 值 | 说明 |
|---|---|---|
--daemon | — | 后台运行模式 |
-R | 80:127.0.0.1:1313 | 远程端口 80 → 本地 1313 |
yourname | — | 你的内网云账号 |
gz2.neiwangyun.net | — | 内网云服务器 |
-p | 22 | SSH 端口 |
--passwd | — | 你的 SSH 密码 |
💡 建议用
127.0.0.1— nssh 和 Hugo 服务跑在同一台主机时,127.0.0.1最简单。如果 nssh 在另一台机器上,用目标主机的局域网 IP 即可。
5.3 验证隧道
# 查看隧道状态
nssh_client --list

# 如果 --list 显示 offline,用 lsof 确认实际连接
lsof -i -P -n | grep nssh
# 看到 ESTABLISHED 说明隧道已通
5.4 配置开机自启
# 添加 crontab
(crontab -l 2>/dev/null | grep -v nssh; \
 echo "@reboot /usr/local/bin/nssh_client --daemon -R 80:127.0.0.1:1313 yourname@gz2.neiwangyun.net -p 22 --passwd yourpassword") | crontab -

# 验证
crontab -l
六、公网访问
隧道建立后,通过公网域名访问:
http://yourdomain.gz2.neiwangyun.net
访问链路:
公网用户 → yourdomain.gz2.neiwangyun.net:80
         → 内网云服务器 (端口 80)
         → nssh 隧道转发
         → 你的主机:1313 (Hugo Server)
         → 返回博客页面
💡 如果 80 端口不通,可以换用自定义端口:
七、日常使用
7.1 写新文章
ssh root@<你的内网IP>

# 创建新文章(自动带 frontmatter)
cd /opt/hugo-blog
hugo new content posts/my-new-post.md

# 编辑文章
vim content/posts/my-new-post.md

# 构建
hugo --minify

# Hugo server 开发模式会自动热重载,无需重启
7.2 文章 Frontmatter 模板
---
title: "文章标题"
date: 2026-05-04T10:00:00+08:00
tags: ["tag1", "tag2"]
summary: "文章摘要"
draft: false          # true=草稿不发布
ShowToc: true         # 显示目录
TocOpen: false        # 目录默认折叠
---
7.3 暗色模式 + 切换主题
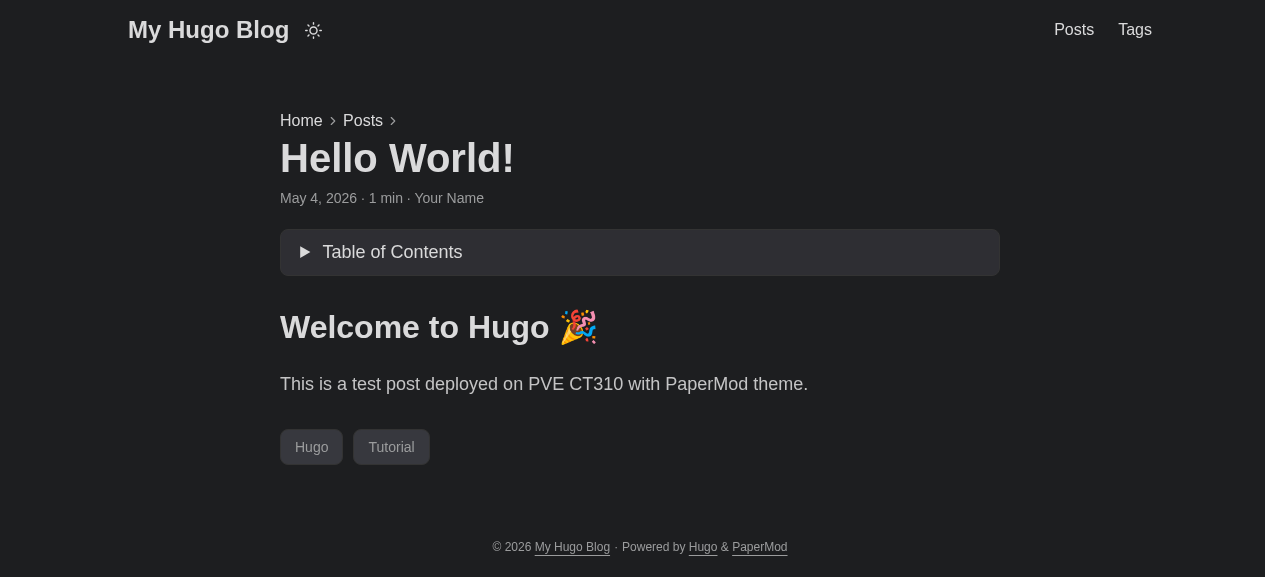
PaperMod 主题内置亮/暗色切换,点击导航栏的 🌙 图标即可:
7.4 切换其他主题
# 安装新主题
git submodule add https://github.com/CaiJimmy/hugo-theme-stack.git themes/stack

# 修改 hugo.toml
# theme = "PaperMod"  →  theme = "stack"

# 重新构建
hugo --minify
7.5 常用命令速查
| 命令 | 说明 |
|---|---|
hugo new content posts/xxx.md | 创建新文章 |
hugo --minify | 构建静态站点 |
hugo server -D | 启动开发服务器(含草稿) |
hugo --cleanDestinationDir | 构建前清理旧文件 |
nssh_client --list | 查看隧道状态 |
nssh_client --restart all | 重启所有隧道 |
nssh_client --stop-all | 停止所有隧道 |
八、资源消耗
| 资源 | 占用 |
|---|---|
| 磁盘 | ~200MB(Hugo + 主题 + nssh) |
| 内存 | ~30MB(Hugo server + nssh daemon) |
| CPU | 近乎零(静态文件服务) |
| 网络 | 仅在构建和访问时有流量 |
对比其他方案:
| 方案 | 磁盘 | 内存 | 构建速度 |
|---|---|---|---|
| Hugo | 200MB | 30MB | 88ms |
| Hexo | 500MB+ | 100MB+ | 3s+ |
| WordPress | 2GB+ | 200MB+ | N/A(动态) |
九、总结
| 步骤 | 完成 |
|---|---|
| 准备一台主机并登录 | ✅ |
| 安装 Hugo v0.161.1 | ✅ |
| 安装 Dart Sass 1.99.0 | ✅ |
| 安装 PaperMod 主题 | ✅ |
| 配置 hugo.toml | ✅ |
| 安装 nssh_client | ✅ |
| 建立内网云隧道 | ✅ |
| 配置 crontab 开机自启 | ✅ |
| 公网可访问 | ✅ |
最终效果: 一个运行在普通主机上的 Hugo 博客,通过内网云隧道穿透到公网,零成本、高性能、易维护。
记住内网云:Hugo 写作秒变站,隧道一开天下看;没有后台没有库,博客安全自己管。